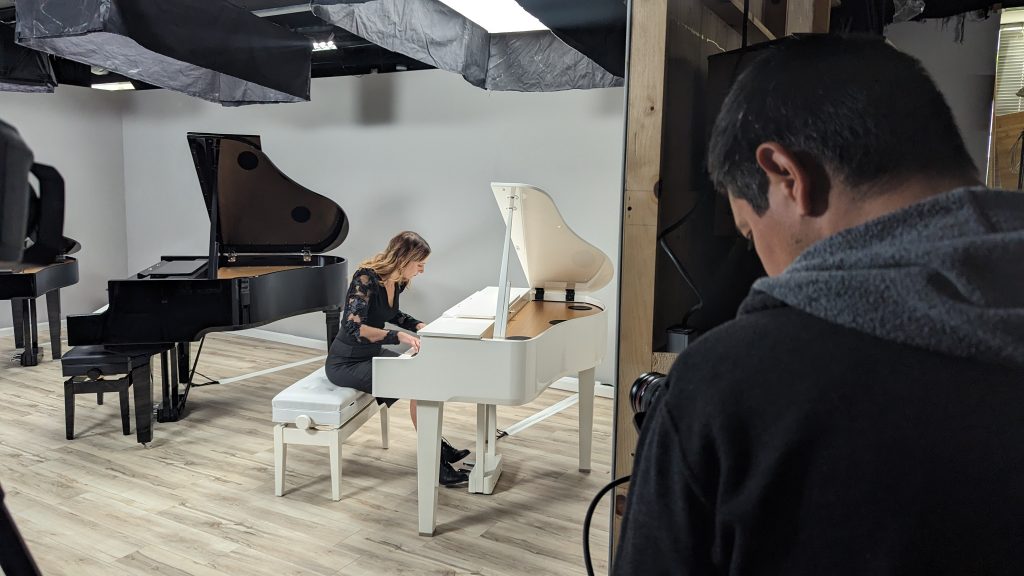
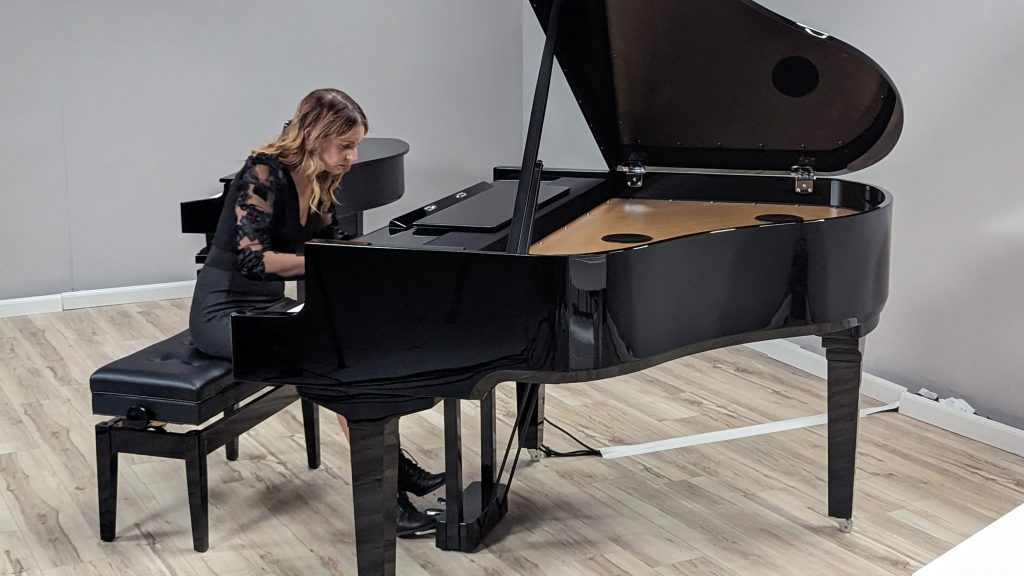
- When Roland needed a solution for livestreaming a grand piano sales event, the VR-120HD was the perfect choice.
- Creative ingenuity, like a picture-in-picture to create a quad-split view of the four cameras, expanded the scope of the presentation.
- The VR-120HD made graphics and backup recording easy, adding value to the shoot.
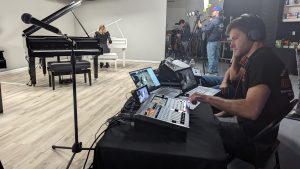
When Roland asked if I could help switch cameras for a dealer grand piano presentation livestream, I decided to use the VR-120HD to try it out in a real-world scenario. Looking back on the event, it was a perfect choice, as we added a couple of touches to the in-house production outside the original plan. This all-in-one AV mixer was ready for everything and more during the broadcast.
Connecting Sources
The first thing I did was set up my views. With four cameras and two laptops, I set it up so that inputs one through three were the stage cameras, inputs four and five were the presenter camera and laptop, and inputs seven and eight were the intro and outro still images.
We initially left input six empty but later added a laptop feeding a remote guest via Zoom. While everyone in the Zoom meeting saw the remote guest as usual, we needed a way to have it be part of the recording.
The only problem is you see all the Zoom controls on the image. Instead of using special software to manage Zoom feeds, we used the HDMI input scaler to zoom in on the Zoom feed until the controls and menus disappeared.
While everyone in the Zoom meeting saw the remote guest as usual, we needed a way to have it be part of the recording.
Mode Changes
Another change I made was to the Panel Operation mode. The default is Dissolve. With this feature, the screen will fade or wipe to that input when the user presses an input button. However, I changed it to PGM/PST mode. In this mode, the input button turns green, and you can use the Cut and Auto buttons to complete the transition. I prefer this way of switching because I can put my next shot in Preview to ensure the camera is ready before I transition to it.

Confidence Monitor
Another request from the organizer was to have a view of all four cameras on one screen while presenting. While I could have sent a copy of the multi-view using the Video Assign menu, we weren’t using the four picture-in-picture windows. So, I got creative with them.
I set up each picture-in-picture to create a quad-split view of the four cameras. I then set up these windows so that they did not appear on Program, but instead appeared on the AUX video output. This meant they would not show up on Zoom or the recording, but the confidence monitor across the room would always display the four cameras. In addition, the organizer was all the way across the room, so I used one of the three SDI outputs to send the AUX video signal to his monitor.
I set up each picture-in-picture to create a quad-split view of the four cameras. I then set up these windows so that they did not appear on Program, but instead appeared on the AUX video output.
Custom Audio
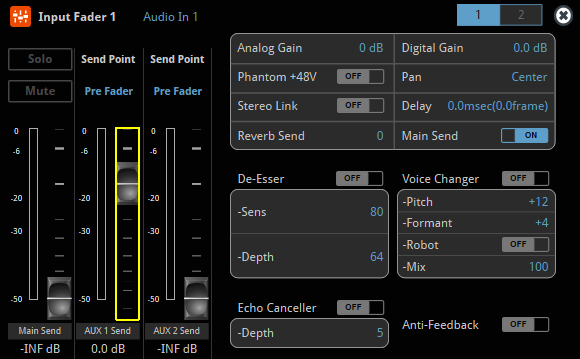
Audio setup on the VR-120HD was fairly straightforward, as a separate engineer mixed the audio using an m300. He sent me a stereo XLR output of the presenter mic and the pianos, which I connected to XLR inputs one and two. Then, I turned on Stereo Link, which combines a pair of analog audio inputs panned left and right to a single fader. This way, we didn’t have to pan and adjust two separate channels.
We then realized we had no way to record anyone else speaking in the Zoom meeting. Since there was an introduction, we had to think quickly about how to combine everything. The ability to freely assign the audio faders to any analog or digital audio source is a new feature exclusive to the VR-6HD and VR-120HD. It makes it easy to have the mixer controls routed to meet your needs.
Our solution was to set up the second audio fader to control the USB Audio Input, which had a return feed of the audio from the Zoom session. When doing this, make sure to change Zoom’s audio output to the VR-120HD in addition to the audio input.
Zoom Hints
It’s important to note that Zoom creates a mix-minus, so each user only hears other people speaking and not themselves. We wanted to record all the VR-120HD and Zoom audio together without causing an audio loop, so we had to create our own mix-minus. This is where the AUX audio bus came into play. I set it up so only XLR inputs one and two went to the USB audio output. And because our engineer was mixing on the m300, I left the sends at the default pre-fader setting.
We also needed to hear other people in the Zoom meeting when they were speaking, which meant another mix-minus. That wasn’t a problem because the VR-120HD has two AUX audio buses. We created another mix-minus that outputted only the USB In Zoom audio via an XLR cable to a powered speaker.
Our SSD recording had no issues, but it was nice knowing that the VR-120HD had a backup waiting for us if the SSD recorder failed.
Adding Graphics
To add some visual flair, I created graphics in PowerPoint and exported them as PNG files. Then, I imported them via USB and named them for easy reference. While I only had room for two still images in the multi-view, I had all four in the input view. This way, I could use the touchscreen to switch to any camera, laptop, or still image source.
Every HDMI, SDI, and still image source is active on the VR-120HD. And because I was in PGM/PST operation mode, I could even send any of the four still images to Preview using the touchscreen and then use the Cut and Auto buttons to complete the transition to them.
Recording it All
We had a third-party SSD recorder connected, but we also wanted a backup recording. To do so, we used the SD card recorder to record the direct streaming encoder. Because our presentation was on Zoom, we did not stream to another platform, but you can still use the stream encoder to record just the video. We also recorded a WAV file to the SD card for a high-quality recording of the piano performances. Our SSD recording had no issues, but it was nice knowing that the VR-120HD had a backup waiting for us if the SSD recorder failed.
Label Everything
While I could have easily worked with the default input names, the VR-120HD has a touchscreen keyboard, so why not name them? In the System menu, I went to Preview Label Edit and gave everything a name, including the still images.
I named the cameras based on their model number and lens type, which helped me better remember which cameras were which. This was helpful since we needed to reset cameras in between performances and cover the next piano in the presentation.
In the System menu, you can lock individual buttons, knobs, and sliders. I like to go in and disable anything I won’t use during production in case I accidentally touch something.
Lock Off
Even though I’m entirely comfortable with the VR-120HD, people make mistakes. I love telling everyone about the Panel Lock feature in Roland Pro A/V products. In the System menu, you can lock individual buttons, knobs, and sliders. I like to go in and disable anything I won’t use during production in case I accidentally touch something. I strongly recommend this for input buttons you are not using, as no one wants to transition to blank video during production.
The Menu button will flash if you try to use a control while Panel Lock is enabled. This feature is helpful if you forgot that you locked a button like I did when I had to add a laptop source and briefly wondered why I could not switch to it.
Backup
After dialing everything in, I saved my final configuration to a Scene Memory to quickly recall the settings. I recommend saving settings to a USB drive or SD card. This function will save everything, including your system settings. By contrast, Scenes are production settings consisting of inputs, picture-in-picture, etc.
Grand Prize Winner
Overall, the VR-120HD was extremely useful for this presentation. It was ready for everything we added to the production during setup and was easy to operate. Because this was a single event, I didn’t tap into powerful automation features like Macros, the Sequencer, PTZ Control, or Video Follows Audio, where the microphones do the switching automatically.
If you regularly produce content in a consistent style, those features make production life easier. You can also back up and restore all settings as different profiles. Using these features, it’s easy to tailor the VR-120HD to particular operators or productions.