- Scenes can help you when you have different groups of settings for different types of events.
- Scenes will recall visual layouts, help create dissolve transitions, and more.
- The V-8HD can store and recall up to 24 unique scenes.
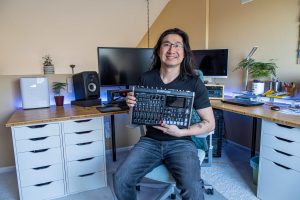
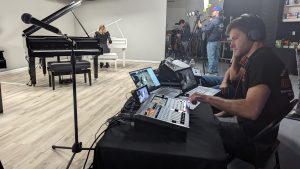
Versatile, portable, and reliable, the Roland V-8HD brings a world of creative options to live event switching. Here we’ll dive into scenes, also known as preset memories. You’ll primarily use scenes to save and recall settings. Additionally, you can employ them for scene-based switching. For example, this function will allow you to dissolve from a wide shot of a band to a still image logo with two Picture in Picture windows, one of each member.
The V-8HD can store and recall up to 24 unique scenes. Each one contains the V-8HD’s settings when saved, except the following menus: Preset Memory, Macro, Sequencer, CTL/EXP, Capture Image, and System.
Scenes Applications
Scenes can help you when you have different groups of settings for different types of events. They also are useful when switching between different Picture in Picture and DSK configurations. Finally, try scenes when you want to have the DSK target different still images without going into the menu.
General Setup
Scenes are stored and recalled using either the hardware controls or V-8HD Remote app for iPad. In addition to menu settings, scenes will recall visual layouts. You can create dissolve transitions by using the following setting:
- Menu > Preset Memory > Fade Time
- Set layers to be affected.
When set to 0.0sec, the clip will cut instead of dissolving. If you set a Fade Time to higher than 0.0sec and recall a scene, it will dissolve out the PinP and DSK layers, dissolve to the new scene’s input, and dissolve the layers back in.
It may help to turn off the audio submenus here if you do not want your scene recalls affecting your audio settings. To prevent certain submenus from having their settings changed use the following:
- Menu > Preset Memory > Load Parameter
Hardware Setup
- To access scenes, press the Mode button until Memory is lit.
- The eight multi-purpose buttons next to it will turn blue. If there is no scene saved to these eight slots, the button will remain unlit.
- To create or overwrite a scene, set up your Program layout and configure your settings.
- Press and hold one of the eight multi-purpose buttons until it flashes, confirming the scene was saved.
- To recall a scene, press any of the blue multi-purpose buttons. If you press an unlit multi-purpose button, it will load the default settings. Anything turned off in the Load Parameter sub-menu will not be affected.
The following setting will turn your A and B row buttons into Scenes 9-24. Note that that this disables PGM and PST input selection.
- Menu > Preset Memory > Number of Memory SW > 24
You can also save, load, and delete presets in the Preset Memory menu. There are only eight buttons to recall scenes without the Remote App. However, you can expand hardware control in the Preset Memory menu.
Remote App Setup
In addition, you can also recall scenes using the V-8HD Remote app. While it’s possible to rename scenes using the hardware menu, the Remote App makes it easy to quickly rename scenes with the iPad keyboard.
- Tap the Memory button to open the Memory screen.
- You’ll see scenes arranged in three banks of eight scenes each.
- Each scene contains information including the source and any PinP or DSK layers turned on. You can also display a condensed layout of all 24 scenes.
Renaming
- Tap the Name Edit button. While it is flashing, tap the scene number you want to rename.
- To rename still images, tap the Still Image button, and you will see a Name Edit button there.
- You can also rename inputs, scenes, and macros by using the onscreen menu. More information is available in the Reference Manual.
Glossary
- Alpha Channel: Instead of the DSK removing Luma or Chroma from a source, it uses the Alpha Channel from a PNG file or a graphic system’s key source to determine the transparent areas.
- AUX: A bus that directly outputs a video source other than PGM. It does not support overlays. [Note: You can disable the AUX bus to enable Alpha Channel on the DSK.]
- Bus: A grouping of one or more video sources. The V-8HD has PGM, PVW, AUX, and Multi-View busses.
- DSK: Downstream Keyer. Primarily used for overlaying graphics with transparent areas, and for green screens. The V-8HD supports one.
- Keyer: Removes either Luma (black/white), Chroma (blue/green/custom), or Alpha from the DSK source. [Note: PinP 1 and 2 also support Luma and Chroma key.]
- Macro: A list of timed operations that are executed with a single button press.
- Multi-View: A 10-window output that displays HDMI inputs 1-8, PVW, and PGM.
- PinP: A Picture in Picture window. The V-8HD supports up to two.
- PGM: Program. This is the primary output. It combines the selected video input with any PinP and DSK overlays.
- Preset Memory: Referred to as scenes in this guide.
- PST: A preset (separate from scenes/preset memories). This is the input source that goes to Preview. A common workflow is to first select your PST source before performing a transition. This helps prevent switching mistakes.
- PVW: Preview bus. Swap this with the PGM input when you perform a transition. You can also use this to preview the PinP and DSK layers before sending them to PGM. [Note: To tie PinP and DSK layers to transitions, enable Effects Transition Sync in the System menu.]
- Scene: Referred to as a memory or preset memory in the V-8HD controls and menus. It’s like a snapshot of PGM and menu settings.
- Sequencer: A list of scenes, macros, and input selects that are executed manually or with timings.
- Transition: A cut, dissolve, or wipe between the PGM and PVW video busses.


